Tampilkan postingan dengan label mekansm. Tampilkan semua postingan
Dota 2 - Dazzle Build Guide
0
BIO
Each young acolyte to the Dezun order must complete a series of rites before becoming a shadow priest. The final rite, the rite of shades, is a harrowing spiritual journey through the Nothl Realm, an unpredictable domain from which not all visitants return. Of those who do, some return mad. Others return with strange aptitudes. But all who go there are changed by their experiences. Driven by the need for enlightenment, Dazzle was the youngest of his tribe ever to request the sacred ritual. At first the order refused him, saying he was too young. But Dazzle was not to be dissuaded. Sensing something special in the headstrong young acolyte, the elders relented. Dazzle drank down the sacred potion and sat by the fire while the rest of his tribe danced through the night. In this ethereal dimension of the Nothl Realm, the properties of light and dark are inverted. Thus his brilliant healing light, beautiful to our eye, is actually a sinister kind of evil; and the darkest deeds are done in a dazzling glow. The elders' intuition was prophetic: Dazzle returned to his people as a Shadow Priest like none seen before, with the power to heal as well as to destroy. Now he uses his gift to cut down his enemies and mend his friends.
INTRODUCTION
Zzzzaaaappp! that is the sound you would hear when you play this hero!
Dazzle is a kind of hero that is specialized in healing his friends and keep his friends alive. His abilitites are all designed to do just that.
He have a wave of healing to heal all allies. And he also has a skill to prevent an ally from a death, And also he has a skill to increase his team's armor as well as reducing the opposing team's armor.
 ROLE
ROLE
STATS
ABILITIES
1. Poison Touch
 Casts a poisonous spell on an enemy unit, causing damage and slowness over time, and eventual paralysis. Poison Touch mini-stuns on impact. At level 2, the slow increases after 1 second, and at levels 3 and 4, the target is stunned for 1 second after the slow.
One of the few Dezun rites used for offensive purposes, the paralytic enchantment often proves useful.
This skill is needed to initiate a gank. This skill will makes your opponent to slow down and receive some damage. Although this is not a superior skill, but it's still good to at least help chasing and also harassing the enemy.
2. Shallow Grave
 An ally blessed with Shallow Grave, no matter how close to death, cannot die while under its protection.
Only a seasoned acolyte of the Shadow can properly perform the rite of preventing death.
This skill is a very powerful skill that will makes your ally immune to death for 5 seconds. While receiving this buff, even in 0 HP enemy can't do anything to kill the target. What you need to do is: immediately cast this if you see your allies are in low Hp and you feel that he will be death soon.
3. Shadow Wave
 Shadow Wave heals several allies, which in turn cause damage equal to their healing in a small area around them. Dazzle is always healed by Shadow Wave, and it does not count toward the number of targets.
While it is a simplistic and routine rite among Shadow Priests, the Shadow Wave is also the most critical for success.
A healing Wave that deals some allies in the area and also damaging nearby opponents. Needed to keep your teammates alive during a teamfight.
4. Weave
 Applies a buff that increases allied hero armor or decreases enemy hero armor in the target area, changing armor by 1 every second. Upgradable by Aghanim's Scepter.
His ethereal journey into the Nothl realm has allowed Dazzle to mend together the powers of light and dark, creating shifting waves of enchantments.
Increase armor of allies and also reducing enemy's armor in the area. The increase/decrease of armor is not at once but gradually.
SKILLBUILD

Level 1: Shallow Grave
Level 2: Shadow Wave
Level 3: Shadow Wave
Level 4: Poison Touch
Level 5: Shadow Wave
Level 6: Weave
Level 7: Shadow Wave
Level 8: Poison Touch
Level 9 : Poison Touch
Level 10: Poison Touch
Level 11: Weave
Level 12: Shallow Grave
Level 13: Shallow Grave
Level 14: Shallow Grave
Level 15: Stats
Level 16: Weave
Level 17-25: Stats
Why take Shallow Grave for level 1? Eventually, enemy want's to get firstblood on level1, so if you meet one of those who wants to gwt that firstblood, you should immediately cast this to you or your allies to save him.
Why maxed Shadow Wave first? This is your main healing skill and also a nuke. you will need this for saving your allies and also for harassing enemy on early-mid game
Why maxed Poison Touch before Shallow Grave? im my opinion, a level 1 Shallow Grave is enough for early-mid game, a 60 seconds cooldown is enough so you can cast this everytime you see a red-Hp-ed ally. Or you may increase this to level 2 if you feel need more cast on this skill. Meanwhile, the Poison Touch is important for your team to slow down and also to set up a nice gank. You will need the DPS from the Poison Touch.
Each young acolyte to the Dezun order must complete a series of rites before becoming a shadow priest. The final rite, the rite of shades, is a harrowing spiritual journey through the Nothl Realm, an unpredictable domain from which not all visitants return. Of those who do, some return mad. Others return with strange aptitudes. But all who go there are changed by their experiences. Driven by the need for enlightenment, Dazzle was the youngest of his tribe ever to request the sacred ritual. At first the order refused him, saying he was too young. But Dazzle was not to be dissuaded. Sensing something special in the headstrong young acolyte, the elders relented. Dazzle drank down the sacred potion and sat by the fire while the rest of his tribe danced through the night. In this ethereal dimension of the Nothl Realm, the properties of light and dark are inverted. Thus his brilliant healing light, beautiful to our eye, is actually a sinister kind of evil; and the darkest deeds are done in a dazzling glow. The elders' intuition was prophetic: Dazzle returned to his people as a Shadow Priest like none seen before, with the power to heal as well as to destroy. Now he uses his gift to cut down his enemies and mend his friends.
INTRODUCTION
Zzzzaaaappp! that is the sound you would hear when you play this hero!
Dazzle is a kind of hero that is specialized in healing his friends and keep his friends alive. His abilitites are all designed to do just that.
He have a wave of healing to heal all allies. And he also has a skill to prevent an ally from a death, And also he has a skill to increase his team's armor as well as reducing the opposing team's armor.
| PROS | CONS |
| Can save allies from death | Must precise on casting the shallow grave to really protect your target |
| Have a massive heal | Slow |
| Can reduce enemys armor in a teamfight | |
| Can boost allies armor in a teamfight |

Ranged - Support - Lane Support
| LEVEL | 1 | 15 | 25 | ||
|---|---|---|---|---|---|
| HIT POINTS | 454 | 946 | 1,678 | SIGHT RANGE | 1800 / 800 |
| MANA | 351 | 970 | 1,672 | ATTACK RANGE | 500 |
| DAMAGE | 41-59 | 89-107 | 143-161 | MISSILE SPEED | 1200 |
| ARMOR | 2 | 5 | 10 |
ABILITIES
1. Poison Touch
| MANA COST: 100/115/130/145 | COOLDOWN: 15/13/11/7 |
| ABILITY: UNIT TARGET | AFFECTS: ENEMY UNITS |
| DAMAGE: PHYSICAL | DAMAGE: 8 / 16 / 24 / 32 |
| SET TIME: 1 / 2 / 3 / 3 | SLOW: 33% |
| DURATION: 8 / 9 / 10 / 10 |
This skill is needed to initiate a gank. This skill will makes your opponent to slow down and receive some damage. Although this is not a superior skill, but it's still good to at least help chasing and also harassing the enemy.
2. Shallow Grave
| MANA COST: 140/130/120/110 | COOLDOWN: 60/45/30/15 |
| ABILITY: UNIT TARGET | AFFECTS: ALLIED HEROES |
| DURATION: 5 / 5 / 5 / 5 | RANGE: 550 / 700 / 850 / 1000 |
This skill is a very powerful skill that will makes your ally immune to death for 5 seconds. While receiving this buff, even in 0 HP enemy can't do anything to kill the target. What you need to do is: immediately cast this if you see your allies are in low Hp and you feel that he will be death soon.
3. Shadow Wave
| MANA COST: 80/90/100/110 | COOLDOWN: 12/10/8/6 |
| ABILITY: UNIT TARGET | AFFECTS: ALLIED UNITS |
| DAMAGE: PHYSICAL | DAMAGE: 80 / 100 / 120 / 140 |
| DAMAGE RADIUS: 185 | TARGETS: 3 / 3 / 4 / 5 |
A healing Wave that deals some allies in the area and also damaging nearby opponents. Needed to keep your teammates alive during a teamfight.
4. Weave
| MANA COST: 100/100/100 | COOLDOWN: 40 |
| ABILITY: POINT TARGET | RADIUS: 575 / 575 / 575 |
| DURATION: 12 / 18 / 24 | SCEPTER RADIUS: 775 / 775 / 775 |
| SCEPTER DURATION: 18 / 24 / 30 |
Increase armor of allies and also reducing enemy's armor in the area. The increase/decrease of armor is not at once but gradually.
SKILLBUILD
Level 1: Shallow Grave
Level 2: Shadow Wave
Level 3: Shadow Wave
Level 4: Poison Touch
Level 5: Shadow Wave
Level 6: Weave
Level 7: Shadow Wave
Level 8: Poison Touch
Level 9 : Poison Touch
Level 10: Poison Touch
Level 11: Weave
Level 12: Shallow Grave
Level 13: Shallow Grave
Level 14: Shallow Grave
Level 15: Stats
Level 16: Weave
Level 17-25: Stats
Why take Shallow Grave for level 1? Eventually, enemy want's to get firstblood on level1, so if you meet one of those who wants to gwt that firstblood, you should immediately cast this to you or your allies to save him.
Why maxed Shadow Wave first? This is your main healing skill and also a nuke. you will need this for saving your allies and also for harassing enemy on early-mid game
Why maxed Poison Touch before Shallow Grave? im my opinion, a level 1 Shallow Grave is enough for early-mid game, a 60 seconds cooldown is enough so you can cast this everytime you see a red-Hp-ed ally. Or you may increase this to level 2 if you feel need more cast on this skill. Meanwhile, the Poison Touch is important for your team to slow down and also to set up a nice gank. You will need the DPS from the Poison Touch.
STRATEGY
Early Game
Dazzle is a utility hero, he usually needs to buy the courier for his team. And also don't forget to buy the wards. Noobs usually thinks that buying wards is not important, but that's 100% wrong. Ward is a must item for every team in DotA. You need vision from the ward to avoid being ganked by the enemy.
On early game, what you need to do is to support your partner in lane by help him denying the creeps and also try your best to keep him alive by casting the Shadow Wave and also the Shallow Grave if something dangerous happening to your ally or yourself. If your team thinks you need a bit of farm, the Shadow Wave can helps you farming faster by killing damaging some creeps at once.
Mid Game
Mid game is the ganking time! Everybody will roam around the map and find somebody to kill. So always keep your eye on the important place from where the enemy can comes up and always be careful. Always remember to replace the ward if the time is up and also always keeps an eye on the vision from the wards.
If ganks happening to your team, that is your time to action! You are the savior for your team, you have 3 defensive spells to be casted to save your team in a gank. If you think the gank is too dangerous for your ally/ yourself, because of the potentially high burst damage, you must immediately cast the Shallow Grave to save your friend. If that is not so dangerous, you will have the time to cast your ultimate first, it will increase your allies armor to protect them during the clash, and also it will make enemy become squishy and helps your teamd eal more damage. Also remember to cast the Shadow Wave to helps your teammates alive and maybe can damaging enemy a little.
If you sure that all allies is already 100% safe, you can be aggressive by casting the Poison Touch and start harassing your opponent.
If your team's are the one that initiate a gank to the enemy team, first is to cast the Poison Touch and Weave and let your friends to the damaging things. you can also help by attacking the opponent, although your damage is not that good, but it will helps your team to kill enemies.

Late Game
On the late game, your presence become so much more important. Your team will need a man that can guarantee a 100% insurance for the team. And that is your job to do that. You must deliver a safety feel to your allies, to make sure no one will be death during the teamfight.
Your part in the teamfigth might like this:
1. Comes to the teamfight, don't position your friends in front line of your line-up, because if you death, who will save your friends?
2. Immediately cast your ultimate, the Weave to increase ally's armor while also reducing enemy's.
3. Cast your poison touch on a squishy target/
4. Cast Shadow Wave to helps your friends survive in the teamfight
5. Cast Shallow Grave for allies that you see in danger of death
6. If you have the Mekansm, cast it to recover allies health and keep them alive.
That's it, be discipline and keep focusing. Stay calm during teamfight and click the rifght heroes for your Shallow Grave. Hope you will win your teamfight.
And after your team won the teamfight, you can get the Aegis for your team's main hero or your team can push enemy base and destrouy their buildings. Choose wisely!
And if your team's have bad luck and lose the teamfight, run immediately, use all you have to save yourself and your friends. If you have forcestaff use it to escape faster, and always use your skill whenever it's needed to save your allies.
ITEMS BUILD
1. Arcane Boots
Total cost: 1450
Recipe: Boots of Speed + Energy Booster

Why Arcane Boots? You have spammable skills, so you need more mana, with this item, your mana will be fulfilled. And also to replenish mana of the team.
And if you choose to be more supportive you can choose these items:
1. Mekansm
Total cost: 2306
Recipe: Headress + Buckler + Recipe

Why Mekansm? Heal for all allies in AoE, is a must for teamfights.
2. Pipe of Insight
Total cost: 3628
Recipe: Hood of Defiance + Headress + Recipe

Why Pipe of Insight? Gives barrier for all allies in AoE that Block 400 spell damage, very useful.
And if you want to be excel at initaiting a teamfight you can choose these items:

2. Force Staff
Total cost: 2350
Recipe: Staff of Wizardy + Ring of Regen + Recipe

Why Force Staff? ForceStaff is useful on many purposes, you can initiate a teamfight with ForceStaff, or you can save somebody, or you can save yourself.
3. Schyte of Vyse
Total cost: 5675
Recipe: Mystic Staff + Ultimate Orb + Void Stone

Why Schyte of Vyse? Very good item to initiate a teamfight. You are considered a support, and this item is one of the best supportive items you can get.
Or you can use this to defend against somebody by making him become chicken.
Or you can increase more armor for your allies and also decrease more armor for the nenemy by buying this item:
Aghanim Scepter

Why Aghanim's Scepter? With the increasing duration of your ultimate, you will make enemy more squishy while makes allies become tanks.
Total cost: 4700
Recipe: Plate Mail + Mystic Staff + Recipe

Why Shiva's? Gives you an Arctic Blast (Slowing and a 200 damage) and gives you a slowing aura, and also gives you +15 armor which makes you tanky.
GOOD ALLIES
1. Carries
(Example: Magine, Void, Luna)


Early Game
Dazzle is a utility hero, he usually needs to buy the courier for his team. And also don't forget to buy the wards. Noobs usually thinks that buying wards is not important, but that's 100% wrong. Ward is a must item for every team in DotA. You need vision from the ward to avoid being ganked by the enemy.
On early game, what you need to do is to support your partner in lane by help him denying the creeps and also try your best to keep him alive by casting the Shadow Wave and also the Shallow Grave if something dangerous happening to your ally or yourself. If your team thinks you need a bit of farm, the Shadow Wave can helps you farming faster by killing damaging some creeps at once.
Mid Game
Mid game is the ganking time! Everybody will roam around the map and find somebody to kill. So always keep your eye on the important place from where the enemy can comes up and always be careful. Always remember to replace the ward if the time is up and also always keeps an eye on the vision from the wards.
If ganks happening to your team, that is your time to action! You are the savior for your team, you have 3 defensive spells to be casted to save your team in a gank. If you think the gank is too dangerous for your ally/ yourself, because of the potentially high burst damage, you must immediately cast the Shallow Grave to save your friend. If that is not so dangerous, you will have the time to cast your ultimate first, it will increase your allies armor to protect them during the clash, and also it will make enemy become squishy and helps your teamd eal more damage. Also remember to cast the Shadow Wave to helps your teammates alive and maybe can damaging enemy a little.
If you sure that all allies is already 100% safe, you can be aggressive by casting the Poison Touch and start harassing your opponent.
If your team's are the one that initiate a gank to the enemy team, first is to cast the Poison Touch and Weave and let your friends to the damaging things. you can also help by attacking the opponent, although your damage is not that good, but it will helps your team to kill enemies.
Late Game
On the late game, your presence become so much more important. Your team will need a man that can guarantee a 100% insurance for the team. And that is your job to do that. You must deliver a safety feel to your allies, to make sure no one will be death during the teamfight.
Your part in the teamfigth might like this:
1. Comes to the teamfight, don't position your friends in front line of your line-up, because if you death, who will save your friends?
2. Immediately cast your ultimate, the Weave to increase ally's armor while also reducing enemy's.
3. Cast your poison touch on a squishy target/
4. Cast Shadow Wave to helps your friends survive in the teamfight
5. Cast Shallow Grave for allies that you see in danger of death
6. If you have the Mekansm, cast it to recover allies health and keep them alive.
That's it, be discipline and keep focusing. Stay calm during teamfight and click the rifght heroes for your Shallow Grave. Hope you will win your teamfight.
And after your team won the teamfight, you can get the Aegis for your team's main hero or your team can push enemy base and destrouy their buildings. Choose wisely!
And if your team's have bad luck and lose the teamfight, run immediately, use all you have to save yourself and your friends. If you have forcestaff use it to escape faster, and always use your skill whenever it's needed to save your allies.
ITEMS BUILD
1. Arcane Boots
Total cost: 1450
Recipe: Boots of Speed + Energy Booster
| Active: Replenish Mana - Restores mana in an area around the hero. Flat movement speed bonuses from multiple pairs of boots do not stack. + 60 Movement Speed + 250 Mana MANA RESTORED: 135 Mana Needed: 25 Cooldown: 55 |
And if you choose to be more supportive you can choose these items:
1. Mekansm
Total cost: 2306
Recipe: Headress + Buckler + Recipe
| Active: Restore - Heals 250 HP and gives +2 armor in an area. Passive: Mekansm Aura - Bonus HP Regen in an area. Multiple instances of Mekansm Aura do not stack + 5 All Attributes + 5 Armor BONUS HP REGEN: 4 Mana:150 Cooldown:45 |
2. Pipe of Insight
Total cost: 3628
Recipe: Hood of Defiance + Headress + Recipe
| Active: Barrier - Gives nearby friendly units a shield that blocks 400 spell damage. Multiple instances of spell resistance from items do not stack. + 11 HP Regeneration + 30% Spell Resistance Manacost: 100 Cooldown: 60 |
And if you want to be excel at initaiting a teamfight you can choose these items:
1. Dagger
Cost: 2150
Cost: 2150
| Active: Blink - Teleport to a target point up to 1200 units away. If damage is taken from an enemy hero, Blink Dagger cannot be used for 3 seconds. Manacost: 75 Cooldown: 14 |
Blink Dagger is a perfect item for you for initiating purpose. This item will make you can jump straint in front of your target so you can stun them immediately to make a way for your team to knock your enemy down. In a teamfight, who initiate first is usually become the winnner of the fight.
2. Force Staff
Total cost: 2350
Recipe: Staff of Wizardy + Ring of Regen + Recipe
| Active: Force - Pushes any target unit 600 units in the direction it is facing. Double click to self-cast. + 10 Intelligence + 3 HP Regeneration Manacost: 25 Cooldown: 20 |
3. Schyte of Vyse
Total cost: 5675
Recipe: Mystic Staff + Ultimate Orb + Void Stone
| Active: Hex - Turns a target unit into a harmless critter for 3.5 seconds. Destroys illusions. + 10 Strength + 10 Agility + 35 Intelligence + 150% Mana Regeneration Manacost: 100 Cooldown: 35 |
Or you can use this to defend against somebody by making him become chicken.
Or you can increase more armor for your allies and also decrease more armor for the nenemy by buying this item:
Aghanim Scepter
| Passive: Ultimate Upgrade - Upgrades the ultimates of certain heroes. + 10 All Attributes + 200 Health + 150 Mana |
Or you may need to slow down your enemies with this item
Shivs's GuardTotal cost: 4700
Recipe: Plate Mail + Mystic Staff + Recipe
| Active: Arctic Blast - Emits a freezing wave that does 200 damage to enemies and slows their movement by -40% for 4.0 seconds. Passive: Freezing Aura - Reduces attack speed on enemies. Multiple instances of Freezing Aura do not stack. + 30 Intelligence + 15 Armor AURA SLOW: 25% Manacost: 100 Cooldown: 30 |
GOOD ALLIES
1. Carries
(Example: Magine, Void, Luna)
They need more survivability in the teamfight, helps them!
Dota 2 - Necrolyte Build Guide
0
BIO
In a time of great plague, an obscure monk of dark inclinations, one Rotund'jere, found himself promoted to the rank of Cardinal by the swift death of all his superiors. While others of the order went out to succor the ill, the newly ordained cardinal secluded himself within the Cathedral of Rumusque, busily scheming to acquire the property of dying nobles, promising them spiritual rewards if they signed over their terrestrial domains. As the plague receded to a few stubborn pockets, his behavior came to the attention of the greater order, which found him guilty of heresy and sentenced him to serve in the plague ward, ensorcelled with spells that would ensure him a slow and lingering illness. But they had not counted on his natural immunity. Rotund'jere caught the pox, but instead of dying, found it feeding his power, transforming him into a veritable plague-mage, a Pope of Pestilence. Proclaiming himself the Necrolyte, he travels the world, spreading plague wherever he goes, and growing in terrible power with every village his pestilential presence obliterates.
INTRODUCTION
Necrolyte is a healer hero that will save allies from death in teamfights. He have a mass healing skill with a low cooldown that will restore lots of allies HP.
He also have a Grim Reaper skill that will instantly kill a target if the target is on a low HP. He can also regain some mana regen and HP regen if he kill something.
He is a support with his healing skill, yet he is a carry with his Grim Reaper Skill.

STATS
ABILITIES
 Necrolyte releases a wave of death around him, dealing damage to enemy units and healing allied units.
Combining his monk heritage with his newfound affinity for plague has a menacing result.
This is your main skill for the game, this is your heart, your healing skill for allies that will also deal damages to enemies. You need to spam this skill in every Situatioin, you need to get lots of mana so you can keep spamming this skill. You need this in teamfight to keep allies alive. You need this in early game, to keep allies alive, and also to deal damage in ganks. Also you can combine this skill with Mekansm to heal more HP to allies. The keyword for this skill is: spam!
2. Heartstopper Aura
 Necrolyte stills the hearts of his opponents, causing nearby enemy units to lose a percentage of their max health over time.
Those who come within a short distance of the Necrolyte can feel pestilence and plague in the air.
Makes enemies to lose a small percentage of their HP over time if they are aroud Necrolyte in 1000 area. Not a deathly skill, but still it have an impact for enemies. helps to make enemies to lose their HP. On early game, this skill can helps cancelling Healing Salve or Clarity. Can helps you in chasing low HP enemies and kill him with this aura. Also can auto lasthits creeps sometimes.
3. Sadist
 Necrolyte gains hp and mana regeneration for every unit he kills. Hero kills grant 10x the regen bonus.
Poor souls who succumb to Rotund'jere's plagues are recycled for future use.
Makes you gain mana regen and Hp regen everytime you kill creeps or heroes. Good to restore your health and mana. Makes you can keep surviving in the laning phase. Makes you can spam your skill because you will have lots of mana.
4. Reaper's Scythe
 Stuns the target enemy hero, then deals damage based on how much life it is missing. Upgradable by Aghanim's Scepter.
The amount of death and suffering in the air increases the power of the Necrolyte's plague magic.
Kill enemy if he is on a low HP. The damage is based on his Hp, the less HP he have, the more chance he will be killed by this skill. the math is: enemy lose 0.5 of his max HP, he will receive 0.9 (lvl 3 of skill) x 0.5 = 0.45 HP, and enemy will have his HP become 0.5-0.45=0.05.
Very deathly spell to a single target. You can combo this with huskar, first, huskar use his ulty on opponent, then you use yours, enemy will have their HP reduce to 50% from Huskar's ultimate, and you will kill him with your ultimate.
SKILLBUILD
 Level 1: Death Pulse
Level 2: Heartstopper Aura
Level 3: Death Pulse
Level 4: Sadist
Level 5: Death Pulse
Level 6: Reaper's Scythe
Level 7: Death Pulse
Level 8: Sadist
Level 9 : Sadist
Level 10: Sadist
Level 11: Reaper's Scythe
Level 12: Heartstopper Aura
Level 13: Heartstopper Aura
Level 14: Heartstopper Aura
Level 15: Stats
Level 16: Reaper's Scythe
Level 17-25: Stats
Why maxed Death Pulse first? This is your main skill for the game, you will need this in every situation you meet in the game, from laning, ganking, or teamfights. Massive heal is the heart of the team, and you can make your friends to survive with your massive heal. Alo will deal some damages and helps team to kills enemies.
Take 1 level of Heart Stopper aura to make your foe's feel uncomfortable in lane. Can also cancel Healing Salve or Clarity
Why maxed Sadist befor Heartstopper Aura? This will make your mana always healthy and can spam your main skill for the game, Death Pulse, spam death pulse is your priority.
In a time of great plague, an obscure monk of dark inclinations, one Rotund'jere, found himself promoted to the rank of Cardinal by the swift death of all his superiors. While others of the order went out to succor the ill, the newly ordained cardinal secluded himself within the Cathedral of Rumusque, busily scheming to acquire the property of dying nobles, promising them spiritual rewards if they signed over their terrestrial domains. As the plague receded to a few stubborn pockets, his behavior came to the attention of the greater order, which found him guilty of heresy and sentenced him to serve in the plague ward, ensorcelled with spells that would ensure him a slow and lingering illness. But they had not counted on his natural immunity. Rotund'jere caught the pox, but instead of dying, found it feeding his power, transforming him into a veritable plague-mage, a Pope of Pestilence. Proclaiming himself the Necrolyte, he travels the world, spreading plague wherever he goes, and growing in terrible power with every village his pestilential presence obliterates.
INTRODUCTION
Necrolyte is a healer hero that will save allies from death in teamfights. He have a mass healing skill with a low cooldown that will restore lots of allies HP.
He also have a Grim Reaper skill that will instantly kill a target if the target is on a low HP. He can also regain some mana regen and HP regen if he kill something.
He is a support with his healing skill, yet he is a carry with his Grim Reaper Skill.

ROLE
Ranged - Support - Durable - Carry
| LEVEL | 1 | 15 | 25 | ||
|---|---|---|---|---|---|
| HIT POINTS | 454 | 986 | 1,746 | SIGHT RANGE | 1800 / 800 |
| MANA | 286 | 741 | 1,326 | ATTACK RANGE | 550 |
| DAMAGE | 44-48 | 79-83 | 124-128 | MISSILE SPEED | 900 |
| ARMOR | 1 | 4 | 10 |
ABILITIES
1. Death Pulse
| MANA COST: 125/145/165/185 | COOLDOWN: 8/7/6/5 |
| ABILITY: NO TARGET | DAMAGE: MAGICAL |
| DAMAGE: 75 / 125 / 200 / 275 | RADIUS: 475 |
| HEAL: 70 / 90 / 110 / 130 |
This is your main skill for the game, this is your heart, your healing skill for allies that will also deal damages to enemies. You need to spam this skill in every Situatioin, you need to get lots of mana so you can keep spamming this skill. You need this in teamfight to keep allies alive. You need this in early game, to keep allies alive, and also to deal damage in ganks. Also you can combine this skill with Mekansm to heal more HP to allies. The keyword for this skill is: spam!
2. Heartstopper Aura
| ABILITY: PASSIVE, AURA | AFFECTS: ENEMIES |
| DAMAGE: HP REMOVAL | RADIUS: 1000 |
| DECAY: 0.6% / 0.9% / 1.2% / 1.5% | CONTOH: DIHAPUS6 |
Makes enemies to lose a small percentage of their HP over time if they are aroud Necrolyte in 1000 area. Not a deathly skill, but still it have an impact for enemies. helps to make enemies to lose their HP. On early game, this skill can helps cancelling Healing Salve or Clarity. Can helps you in chasing low HP enemies and kill him with this aura. Also can auto lasthits creeps sometimes.
3. Sadist
| ABILITY: PASSIVE | MANA REGEN: 2 / 4 / 6 / 10 |
| HP REGEN: 1 / 2 / 3 / 4 | DURATION: 6 |
Makes you gain mana regen and Hp regen everytime you kill creeps or heroes. Good to restore your health and mana. Makes you can keep surviving in the laning phase. Makes you can spam your skill because you will have lots of mana.
4. Reaper's Scythe
| MANA COST: 175/340/500 | COOLDOWN: 100/85/70 |
| ABILITY: UNIT TARGET | AFFECTS: ENEMY HEROES |
| DAMAGE: MAGICAL | DAMAGE PER MISSING HP: 0.4 / 0.6 / 0.9 |
| STUN DURATION: 1.5 / 1.5 / 1.5 | SCEPTER MANA COST: 150 / 340 / 500 |
| SCEPTER COOLDOWN: 70 / 70 / 70 | SCEPTER DAMAGE PER MISSING HP: 0.6 / 0.9 / 1.2 |
Kill enemy if he is on a low HP. The damage is based on his Hp, the less HP he have, the more chance he will be killed by this skill. the math is: enemy lose 0.5 of his max HP, he will receive 0.9 (lvl 3 of skill) x 0.5 = 0.45 HP, and enemy will have his HP become 0.5-0.45=0.05.
Very deathly spell to a single target. You can combo this with huskar, first, huskar use his ulty on opponent, then you use yours, enemy will have their HP reduce to 50% from Huskar's ultimate, and you will kill him with your ultimate.
SKILLBUILD
Level 2: Heartstopper Aura
Level 3: Death Pulse
Level 4: Sadist
Level 5: Death Pulse
Level 6: Reaper's Scythe
Level 7: Death Pulse
Level 8: Sadist
Level 9 : Sadist
Level 10: Sadist
Level 11: Reaper's Scythe
Level 12: Heartstopper Aura
Level 13: Heartstopper Aura
Level 14: Heartstopper Aura
Level 15: Stats
Level 16: Reaper's Scythe
Level 17-25: Stats
Why maxed Death Pulse first? This is your main skill for the game, you will need this in every situation you meet in the game, from laning, ganking, or teamfights. Massive heal is the heart of the team, and you can make your friends to survive with your massive heal. Alo will deal some damages and helps team to kills enemies.
Take 1 level of Heart Stopper aura to make your foe's feel uncomfortable in lane. Can also cancel Healing Salve or Clarity
Why maxed Sadist befor Heartstopper Aura? This will make your mana always healthy and can spam your main skill for the game, Death Pulse, spam death pulse is your priority.
STRATEGY
Early Game
You can take wherever lane you want. You have the ability to survive in any lane, hard lane or easy lane. You have massive heal that helps you and allies to survive. You also have a long ranged attack that makes you easier to control the lane, you can harass opponents or you can last hits and denying easily. You can also deals lots of damages to enemies heroes and creeps using Death Pulse.
Mid Game
In mid game, you can change lane to gank someone. Use your Death pulse, right click, and Reaper's Schyte to knock down enemies. Also, you maybe already have mekansm that can makes you have one more AoE heal for the team. You will be the nurse of the team , although you are old and scary. Healing allies is your priority. You need to position yourself in the middle of your friends, so that you can heal all your friends in area around you.
 Late Game
In late game, your job is still the same, to keep allies alive with your AoE heal. You maybe also already have a Sheepstick that can make a single enemy to transform into a ckicken and can't do anything for 3.5 seconds. Also don't forger to use your ultimate to enemy that his HP is low and ready to get killed. After winning a teamfight, don't forget to push or to kill Roshan. Necrolyte, the best healer in DotA.
ITEM BUILD
1. Arcane Boots
Total cost: 1450
Recipe: Boots of Speed + Energy Booster
Why Arcane Boots? It will meake your skill Death Pulse spammable in every situation in early-mid game (saves lives, farming, harassing). And restores mana for allied heroes.
2. Mekansm
Total cost: 2306
Recipe: Headress + Buckler + Recipe
Why Mekansm? Heal for all allies in AoE, is a must for teamfights. Combined with your Heal makes your team have a massive heal that grant allies to survive.
3. Schyte of Vyse
Total cost: 5675
Recipe: Mystic Staff + Ultimate Orb + Void Stone
Why Schyte of Vyse? Very good item to initiate a teamfight.
4. Shivs's Guard
Total cost: 4700
Recipe: Plate Mail + Mystic Staff + Recipe
Why Shiva's? Make your slowing aura much more stronger + Arctic Blast (More Slow and 200 damage).
If you feel enough of your Supportive items, you can buy some DPS items like Radiance or Maelstorm.
5 Radiance
Total cost: 5150
Recipe: Sacred Relic + Recipe

Why Radiance? Helps yo to deal some constant damage in teamfights. Also helps in farming creeps
4. Maelstorm and upgrade it into Mjolnir
Total cost: Maelstorm; 2700, +2700 = Mjolnir = 5400
Recipe: Maelsorm: Gloves of Haste + Mythrill Hammer + Recipe
Mjolnir: Maelstorm + Hyperstone + Recipe.


Makes you a decent carry with it's additional attack speed and lightning ability. Makes you got more lightning and makes you to create a powerful thunderstorm.
GOOD ALLIES
1. Ancient Apparition
 His ultimate is the nightmare of all healer, especially you. His ultimate stops all regeneration and heal. Necrolyte, the best healer in DotA so, you will be in trouble cause your heal will have no effect.
2. Magina
Can burn your mana and kill you with his nuke and make you die quickly.
VIDEO SECTION
1. Purge Plays Necroltye
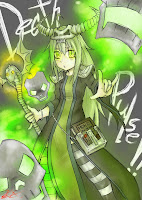
FANART Here I will collect some cool picture of Necrolyte, enjoy the pics. Right click, open link in New Tab to enlarge


Early Game
You can take wherever lane you want. You have the ability to survive in any lane, hard lane or easy lane. You have massive heal that helps you and allies to survive. You also have a long ranged attack that makes you easier to control the lane, you can harass opponents or you can last hits and denying easily. You can also deals lots of damages to enemies heroes and creeps using Death Pulse.
Mid Game
In mid game, you can change lane to gank someone. Use your Death pulse, right click, and Reaper's Schyte to knock down enemies. Also, you maybe already have mekansm that can makes you have one more AoE heal for the team. You will be the nurse of the team , although you are old and scary. Healing allies is your priority. You need to position yourself in the middle of your friends, so that you can heal all your friends in area around you.

In late game, your job is still the same, to keep allies alive with your AoE heal. You maybe also already have a Sheepstick that can make a single enemy to transform into a ckicken and can't do anything for 3.5 seconds. Also don't forger to use your ultimate to enemy that his HP is low and ready to get killed. After winning a teamfight, don't forget to push or to kill Roshan. Necrolyte, the best healer in DotA.
ITEM BUILD
1. Arcane Boots
Total cost: 1450
Recipe: Boots of Speed + Energy Booster
| Active: Replenish Mana - Restores mana in an area around the hero. Flat movement speed bonuses from multiple pairs of boots do not stack. + 60 Movement Speed + 250 Mana MANA RESTORED: 135 Mana Needed: 25 Cooldown: 55 |
2. Mekansm
Total cost: 2306
Recipe: Headress + Buckler + Recipe
| Active: Restore - Heals 250 HP and gives +2 armor in an area. Passive: Mekansm Aura - Bonus HP Regen in an area. Multiple instances of Mekansm Aura do not stack + 5 All Attributes + 5 Armor BONUS HP REGEN: 4 Mana:150 Cooldown:45 |
3. Schyte of Vyse
Total cost: 5675
Recipe: Mystic Staff + Ultimate Orb + Void Stone
| Active: Hex - Turns a target unit into a harmless critter for 3.5 seconds. Destroys illusions. + 10 Strength + 10 Agility + 35 Intelligence + 150% Mana Regeneration Manacost: 100 Cooldown: 35 |
4. Shivs's Guard
Total cost: 4700
Recipe: Plate Mail + Mystic Staff + Recipe
| Active: Arctic Blast - Emits a freezing wave that does 200 damage to enemies and slows their movement by -40% for 4.0 seconds. Passive: Freezing Aura - Reduces attack speed on enemies. Multiple instances of Freezing Aura do not stack. + 30 Intelligence + 15 Armor AURA SLOW: 25% Manacost: 100 Cooldown: 30 |
If you feel enough of your Supportive items, you can buy some DPS items like Radiance or Maelstorm.
5 Radiance
Total cost: 5150
Recipe: Sacred Relic + Recipe
| Active: Toggles Burn Damage on or off. Passive: Burn Damage - Deals damage per second in a 650 radius. + 60 Damage BURN DAMAGE: 45 |
4. Maelstorm and upgrade it into Mjolnir
Total cost: Maelstorm; 2700, +2700 = Mjolnir = 5400
Recipe: Maelsorm: Gloves of Haste + Mythrill Hammer + Recipe
Mjolnir: Maelstorm + Hyperstone + Recipe.
| MAELSTORM | MJOLNIR |
Passive: Chain Lightning - Grants a chance on attack to release a Chain Lightning that hits 4 targets, dealing damage. Maelstrom is a Unique Attack Modifier that stacks with other Unique Attack Modifiers, but overrides them when Chain Lightning occurs. + 24 Damage + 25 Attack Speed CHANCE TO CHAIN: 25% CHAIN DAMAGE: 120 | Active: Static Charge - Places a charged shield on a target unit Passive: Chain Lightning - Grants a chance to release Chain Lighting on attack, dealing damage to multiple targets. Mjollnir is a Unique Attack Modifier that stacks with other Unique Attack Modifiers, but overrides them when Chain Lightning occurs. + 24 Damage + 80 Attack Speed CHANCE TO CHAIN: 25% CHAIN DAMAGE: 160 Manacost: 50 Cooldown: 35 |
GOOD ALLIES
2. Carries
(Example: Magine, Void, Luna)
BAD ENEMIES(Example: Magine, Void, Luna)
Carries should come after you initiate a teamfight, and they should the right click and use all their skills to the enemies.
1. Ancient Apparition
2. Magina
VIDEO SECTION
1. Purge Plays Necroltye
Purge plays Necrolyte shows you how to play necrolyte. Enjoy the vids while drinking coffee in the morning.
2. Beginner's Guide to Necrolyte
Makes you can plays Necrolyte well.FANART Here I will collect some cool picture of Necrolyte, enjoy the pics. Right click, open link in New Tab to enlarge


Dota 2 - Lion Build Guide
0
BIO
Once a Grandmaster of the Demon Witch tradition of sorcery, Lion earned fame among his brethren for fighting on the side of light and righteousness. But adulation corrupts. With powers surpassed only by his ambition, the mage was seduced by a demon and turned to evil, trading his soul for prestige. After committing horrible crimes that marred his soul, he was abandoned. The demon betrayed him, striking better deals with his enemies. Such was Lion's rage that he followed the demon back to hell and slew it, ripping it limb from limb, taking its demonic hand for his own. However, such demonoplasty comes at a cost. Lion was transfigured by the process, his body transformed into something unrecognizable. He rose from hell, rage incarnate, slaying even those who had once called him master, and laying waste to the lands where he had once been so adored. He survives now as the sole practitioner of the Demon Witch tradition, and those who present themselves as acolytes or students are soon relieved of their mana and carried off by the faintest gust of wind.
INTRODUCTION
Lion is one of the best ganker in DotA. He have 2 kind of disables, a stun and a hex. He also have a deadly ultimate that can one-shot a low HP enemy hero until death.
You are considered a squishy hero, so don't trade blows with enemy' carries. Cause you will be death soon.
Lion is also considered an initiator for teamfights and ganks.
Blink Dagger will help you to initiate a teamfight or gank. You must Blink into near the opponent and then stun / hex him. And after he is being disabled, and you + friends must use all of your skills to kill him. that's it for the introduction of Lion.

Once a Grandmaster of the Demon Witch tradition of sorcery, Lion earned fame among his brethren for fighting on the side of light and righteousness. But adulation corrupts. With powers surpassed only by his ambition, the mage was seduced by a demon and turned to evil, trading his soul for prestige. After committing horrible crimes that marred his soul, he was abandoned. The demon betrayed him, striking better deals with his enemies. Such was Lion's rage that he followed the demon back to hell and slew it, ripping it limb from limb, taking its demonic hand for his own. However, such demonoplasty comes at a cost. Lion was transfigured by the process, his body transformed into something unrecognizable. He rose from hell, rage incarnate, slaying even those who had once called him master, and laying waste to the lands where he had once been so adored. He survives now as the sole practitioner of the Demon Witch tradition, and those who present themselves as acolytes or students are soon relieved of their mana and carried off by the faintest gust of wind.
INTRODUCTION
Lion is one of the best ganker in DotA. He have 2 kind of disables, a stun and a hex. He also have a deadly ultimate that can one-shot a low HP enemy hero until death.
You are considered a squishy hero, so don't trade blows with enemy' carries. Cause you will be death soon.
Lion is also considered an initiator for teamfights and ganks.
Blink Dagger will help you to initiate a teamfight or gank. You must Blink into near the opponent and then stun / hex him. And after he is being disabled, and you + friends must use all of your skills to kill him. that's it for the introduction of Lion.
| PROS | CONS |
| Have 2 strong disables | Squishy |
| Have a deadly single target ultimate | Ugly face |
| Doesn't need a much farm to be good | Low movement speed |
| Can drain enemy's mana | Low attck damage |

ROLE
Ranged - Disabler - Nuker - Lane Support - Support
STATS
ABILITIES
The Demon Witch exercises his demonic covenant, opening a fissure from hell.
This is your skill to stuns the enemy in a straight line in front of you. Careful! Because of the nature of the skill, it can miss sometimes. You must place this skill carefully. You must only cast this if your you are already beside your target. That's because if you already clicked this skill from far away, the miss rate will be high. A Blink dagger may helps you into a better initiation.
You need this skill for ganking. This is must skill to chase enemies and stun them. And a stunned enemy is your friends breakfast.
2. Hex
 Transforms an enemy unit into a harmless beast, with all special abilities disabled.
Lion is compelled to share his transfiguration, twisting the essence of those who oppose him.
Makes your opponent becomes Frog and can't do anything. This skill is very powerful in an initiation. You come and make enemy becomes Frog, and that's your team's chance to kill him quickly. The accuracy of this skill is better than the Earth Spike because it is a targeted spell and cannot miss. So if you only facing a single opponent, it is recommended for you to use Hex first before the Earth Spike to make sure your enemy is being disabled.
3. Mana Drain
 CHANNELED - Absorbs the magical energies of a target enemy unit by taking mana from it every second.
Lesser magi are nothing more than a source of magical restoration for the Demon Witch.
This ability will drains mana of one enemy. Can be casted on ranged lane creep or some neutrals. This skill is an almost "bad" skill to take. Without this and with just +stats you still be able to cast your other skills. And with +stats is more powerful because also adds +damage and +mana & mana regen from +int, and +HP from +str.
4. Finger of Death
 Rips at an enemy unit, trying to turn it inside-out. Deals massive damage. Upgradable with Aghanim's Scepter.
Lion's disfigured hand is also the source of his greatest power, capable of flooding victims with malefic force
This is your ultimate, you can one-hit kill enemy with this skill. This skill has a decent single targeted damage that can lasthit enemy hero in one shot. If your carry cannot kill the target, that's your chance to get 1 kill, with this skill, is easy to kill 1 hero in low HP, especially in early-mid game. Very good to kill steal peoples, but not recommended to kill steal a carry in a competitive games. That will make your team's carry become poor and your team will be so weak.
SKILLBUILD
 Level 1: Earth Spike
Level 2: Hex
Level 3: Earth Spike
Level 4: Hex
Level 5: Earth Spike
Level 6: Finger of Death
Level 7: Earth Spike
Level 8: Hex
Level 9 : Hex
Level 10: Stats
Level 11: Finger of Death
Level 12: Stats
Level 13: Stats
Level 14: Stats
Level 15: Stats
Level 16: Finger of Death
Level 17-21: Stats
Level 21-25: Mana Drain
Why you should maxed the Earth Spike first? This is the nuke you need for early-mid game. You need this for farming, harassing, and ganking. This can also provide you with a defense mechanism, while being ganked, immediately stun the enemies and makes yourself / team safe.
Why you should not taking the Mana Drain? Well it's not a bad skill at all but it will surely can't fit the fast phase in a teamfight, it takes long time to drains one's mana. Increasing the additional Stats is a better choice because it gives more HP, more mana pool, and more damage.
STRATEGY
Early Game
Usually, Lion takes a support role in a match. Support role is role that responsible to buy animal courier and some wards. You are capable of doing that because you do not need so much farm. You are a skill dependent hero that not need many luxury items to be good.
Mid Laner
Lion can also become a solo-mid, a solo-mid er don't need to buy the wards and the courier because a solo-mid needs to be the farther in terms of farming, to be the best in maps in terms of level and items.
Last hitting and harrassing is your main priority on the mid lane. Last hitting and harassing is rather easy for this hero. That's because you have a decent range of 600. That is considered far than other hero so that you can dominate enemy hero on farming phase. You can use Earth Spike once in a while for harassing and also last hitting the creeps.
Please keep an eye on the warded place. So you can retreat when you see the enemy is coming to kill you.
Support
If you have a carry partner in lane, you can helps him with denying the creeps. Please do not last hits or your carry will become poor. If he become poor, he cannot carry your team to win the late game.
If there are enemies trying to get firstblood by killing you or your friend, you can use Earth Spike immediately to stun them, and run for your safety.
Or you can get firstblood with Earthspike. Ask your partner to do it together. Focus on a target and your team will ge tthe kill.
Please replace the Observer Ward that is already expired with the new one. The team will always needs a vision of the fog of war. That will be needed to make sure your friend not being ganked so you can saves lives. Please ask your partner to keep their eye on the warded place for their own safety.
Mid Game
Mid game is the time for ganking activities. Once you already got your ultimate, you can choose a target to be ganked. Please confirm your friend about who your target is. Then together you can focus fire on him.
Check your target ability first. So if he can become invisible, make sure you bring the item needed to reveal them. You can buy a gem, sentry wards, or dusts.
If your target is only a single target, we recommend you to use the Hex first before the Earth Spike, it will 100% disable the target. Remember that the Earthspike can miss if the target moves. And then all your friends should come too and use their ability to the target. And if hasn't die, kill with Finger of Death. Don't use Finger of Death if he is 100% death without using it.
A Blink Dagger will really helps you in ganking. Blink in to the enemy and immediately stun/hex him and kill him using right click and Finger of Death.

Late Game
Late game is the time for decisive teamfights. Remember to keep calm here. A little mistake can cost you the game. As a support, better to always replace the expired wards. That is needed to keep an eye of every enemy's move.
Here you should make a wise decision to choose between 2 options:
1. To save money for buyback
2. To buy your next item
How to choose between those two? you may see how important is your next item. You can see it by: If you don't buy that item immediately, your team's can't compete with the enemy's power so buy it immediately, but if the item is not that important, you should save for buyback.
In late game teamfight, your part is to disables enemy using your 2 skills, Earth Spike and Hex. You need to act quickly by using Dagger or Force Staff if you have one, and stun / hex one target and makes him get killed before the teamfight start. You are considered an initiator-support for the team, it is ok for you to give your life if that will makes your team to win the teamfight.
ITEMS BUILD
1. Bottle
Cost: 600

2. Arcane Boots
Total cost: 1450
Recipe: Boots of Speed + Energy Booster
Why Arcane Boots? This boots provides mana for you & your team. Can replenish 135 mana for the team.
3. Blink Dagger
Cost: 2150

Why Blink Dagger?
1. Perfect for initiating a teamfight
2. Helps you escape
4. Mekansm
Total cost: 2306
Recipe: Headress + Buckler + Recipe
Why Mekansm? Heal for all allies in AoE, is a must for teamfights.
5 Pipe of Insight
Total cost: 3628
Recipe: Hood of Defiance + Headress + Recipe
Why Pipe of Insight? Gives barrier for all allies in AoE that Block 400 spell damage, very useful.
6. Schyte of Vyse
Total cost: 5675
Recipe: Mystic Staff + Ultimate Orb + Void Stone
Why Schyte of Vyse? Very good item to initiate a teamfight. or to defend against somebody.
7. Refresher Orb
Total cost: 5300
Recipe: Obilivion Staff + Preserverance + Recipe

Why Refresher? This item makes you can use your skills 2 times, 2x Stun, 2x Hex, and 2x Finger. Very powerful item to win a teamfight. 100 increasing the chance of winning a teamfight.
But before you buy this item, check your mana capacity first, if your mana is enough to use 2 times stun, 2 times hex, and 2 times finger, then you can buy this item.
GOOD ALLIES
1. Lina
 Have a sweet ultimate combo with you. Laguna Blade + Finger of Death will gives opponent the true nightmare of instant kill. with about 2000 instant damage, this heroes combo is a true nightmare to all who dare to oppose them.
2. Carries
(Example: Magine, Void, Luna)
STATS
| LEVEL | 1 | 15 | 25 | ||
|---|---|---|---|---|---|
| HIT POINTS | 454 | 906 | 1,609 | SIGHT RANGE | 1800 / 800 |
| MANA | 286 | 832 | 1,482 | ATTACK RANGE | 600 |
| DAMAGE | 42-48 | 84-90 | 134-140 | MISSILE SPEED | 900 |
| ARMOR | 1 | 4 | 9 |
ABILITIES
1. Earth Spike

Rock spikes burst from the earth along a straight path. Enemy units are hurled into the air, then are stunned and take damage when they fall.| MANA COST: 100/120/145/170 | COOLDOWN: 12 |
| ABILITY: UNIT TARGET, POINT TARGET | AFFECTS: ENEMY UNITS |
| DAMAGE: MAGICAL | DAMAGE: 60 / 130 / 200 / 260 |
| URATION: 1.02 / 1.52 / 2.02 / 2.52 | LENGTH: 825 / 825 / 825 / 825 |
This is your skill to stuns the enemy in a straight line in front of you. Careful! Because of the nature of the skill, it can miss sometimes. You must place this skill carefully. You must only cast this if your you are already beside your target. That's because if you already clicked this skill from far away, the miss rate will be high. A Blink dagger may helps you into a better initiation.
You need this skill for ganking. This is must skill to chase enemies and stun them. And a stunned enemy is your friends breakfast.
2. Hex
| MANA COST: 125/150/175/200 | COOLDOWN: 15 |
| ABILITY: UNIT TARGET | AFFECTS: ENEMY UNITS |
| DURATION: 1.75 / 2.5 / 3.25 / 4 | CONTOH: DIHAPUS6 |
Makes your opponent becomes Frog and can't do anything. This skill is very powerful in an initiation. You come and make enemy becomes Frog, and that's your team's chance to kill him quickly. The accuracy of this skill is better than the Earth Spike because it is a targeted spell and cannot miss. So if you only facing a single opponent, it is recommended for you to use Hex first before the Earth Spike to make sure your enemy is being disabled.
3. Mana Drain
| MANA COST: 10/10/10/10 | COOLDOWN: 20/15/10/5 |
| ABILITY: CHANNELED, UNIT TARGET | AFFECTS: ENEMY UNITS |
| CHANNEL TIME: 4 / 4 / 4 / 4 | MANA PER SECOND: 20 / 40 / 60 / 120 |
| BREAK DISTANCE: 1100 |
This ability will drains mana of one enemy. Can be casted on ranged lane creep or some neutrals. This skill is an almost "bad" skill to take. Without this and with just +stats you still be able to cast your other skills. And with +stats is more powerful because also adds +damage and +mana & mana regen from +int, and +HP from +str.
4. Finger of Death
| MANA COST: 200/420/650 | COOLDOWN: 160/100/40 |
| ABILITY: UNIT TARGET | AFFECTS: ENEMY UNITS |
| DAMAGE: MAGICAL | DAMAGE: 600 / 725 / 850 |
| SCEPTER DAMAGE: 725 / 875 / 1025 | SCEPTER MANA COST: 200 / 420 / 625 |
This is your ultimate, you can one-hit kill enemy with this skill. This skill has a decent single targeted damage that can lasthit enemy hero in one shot. If your carry cannot kill the target, that's your chance to get 1 kill, with this skill, is easy to kill 1 hero in low HP, especially in early-mid game. Very good to kill steal peoples, but not recommended to kill steal a carry in a competitive games. That will make your team's carry become poor and your team will be so weak.
SKILLBUILD
Level 2: Hex
Level 3: Earth Spike
Level 4: Hex
Level 5: Earth Spike
Level 6: Finger of Death
Level 7: Earth Spike
Level 8: Hex
Level 9 : Hex
Level 10: Stats
Level 11: Finger of Death
Level 12: Stats
Level 13: Stats
Level 14: Stats
Level 15: Stats
Level 16: Finger of Death
Level 17-21: Stats
Level 21-25: Mana Drain
Why you should maxed the Earth Spike first? This is the nuke you need for early-mid game. You need this for farming, harassing, and ganking. This can also provide you with a defense mechanism, while being ganked, immediately stun the enemies and makes yourself / team safe.
Why you should not taking the Mana Drain? Well it's not a bad skill at all but it will surely can't fit the fast phase in a teamfight, it takes long time to drains one's mana. Increasing the additional Stats is a better choice because it gives more HP, more mana pool, and more damage.
STRATEGY
Early Game
Usually, Lion takes a support role in a match. Support role is role that responsible to buy animal courier and some wards. You are capable of doing that because you do not need so much farm. You are a skill dependent hero that not need many luxury items to be good.
Mid Laner
Lion can also become a solo-mid, a solo-mid er don't need to buy the wards and the courier because a solo-mid needs to be the farther in terms of farming, to be the best in maps in terms of level and items.
Last hitting and harrassing is your main priority on the mid lane. Last hitting and harassing is rather easy for this hero. That's because you have a decent range of 600. That is considered far than other hero so that you can dominate enemy hero on farming phase. You can use Earth Spike once in a while for harassing and also last hitting the creeps.
Please keep an eye on the warded place. So you can retreat when you see the enemy is coming to kill you.
Support
If you have a carry partner in lane, you can helps him with denying the creeps. Please do not last hits or your carry will become poor. If he become poor, he cannot carry your team to win the late game.
If there are enemies trying to get firstblood by killing you or your friend, you can use Earth Spike immediately to stun them, and run for your safety.
Or you can get firstblood with Earthspike. Ask your partner to do it together. Focus on a target and your team will ge tthe kill.
Please replace the Observer Ward that is already expired with the new one. The team will always needs a vision of the fog of war. That will be needed to make sure your friend not being ganked so you can saves lives. Please ask your partner to keep their eye on the warded place for their own safety.
Mid Game
Mid game is the time for ganking activities. Once you already got your ultimate, you can choose a target to be ganked. Please confirm your friend about who your target is. Then together you can focus fire on him.
Check your target ability first. So if he can become invisible, make sure you bring the item needed to reveal them. You can buy a gem, sentry wards, or dusts.
If your target is only a single target, we recommend you to use the Hex first before the Earth Spike, it will 100% disable the target. Remember that the Earthspike can miss if the target moves. And then all your friends should come too and use their ability to the target. And if hasn't die, kill with Finger of Death. Don't use Finger of Death if he is 100% death without using it.
A Blink Dagger will really helps you in ganking. Blink in to the enemy and immediately stun/hex him and kill him using right click and Finger of Death.

Late Game
Late game is the time for decisive teamfights. Remember to keep calm here. A little mistake can cost you the game. As a support, better to always replace the expired wards. That is needed to keep an eye of every enemy's move.
Here you should make a wise decision to choose between 2 options:
1. To save money for buyback
2. To buy your next item
How to choose between those two? you may see how important is your next item. You can see it by: If you don't buy that item immediately, your team's can't compete with the enemy's power so buy it immediately, but if the item is not that important, you should save for buyback.
In late game teamfight, your part is to disables enemy using your 2 skills, Earth Spike and Hex. You need to act quickly by using Dagger or Force Staff if you have one, and stun / hex one target and makes him get killed before the teamfight start. You are considered an initiator-support for the team, it is ok for you to give your life if that will makes your team to win the teamfight.
ITEMS BUILD
1. Bottle
Cost: 600
| Use: Regenerate - Restores HP and Mana over time. Effect is lost if unit is attacked. Empty Bottle refills near town fountain. You can also store runes in the bottle, to save for later use. After 2 minutes, stored Runes will be activated. HEALTH RESTORED: 135 MANA RESTORED: 70 DURATION: 3 |
Why Bottle? An early item that can fulfill your needs as a mid laner is a Bottle. It helps you to get some runes for ganking. it also refill your mana and HP for your daily needs. And bottle will makes your time regenerating HP and mana in fountain becomes less.
2. Arcane Boots
Total cost: 1450
Recipe: Boots of Speed + Energy Booster
| Active: Replenish Mana - Restores mana in an area around the hero. Flat movement speed bonuses from multiple pairs of boots do not stack. + 60 Movement Speed + 250 Mana MANA RESTORED: 135 Mana Needed: 25 Cooldown: 55 |
3. Blink Dagger
Cost: 2150
| Active: Blink - Teleport to a target point up to 1200 units away. If damage is taken from an enemy hero, Blink Dagger cannot be used for 3 seconds. Manacost: 75 Cooldown: 14 |
1. Perfect for initiating a teamfight
2. Helps you escape
4. Mekansm
Total cost: 2306
Recipe: Headress + Buckler + Recipe
| Active: Restore - Heals 250 HP and gives +2 armor in an area. Passive: Mekansm Aura - Bonus HP Regen in an area. Multiple instances of Mekansm Aura do not stack + 5 All Attributes + 5 Armor BONUS HP REGEN: 4 Mana:150 Cooldown:45 |
5 Pipe of Insight
Total cost: 3628
Recipe: Hood of Defiance + Headress + Recipe
| Active: Barrier - Gives nearby friendly units a shield that blocks 400 spell damage. Multiple instances of spell resistance from items do not stack. + 11 HP Regeneration + 30% Spell Resistance Manacost: 100 Cooldown: 60 |
6. Schyte of Vyse
Total cost: 5675
Recipe: Mystic Staff + Ultimate Orb + Void Stone
| Active: Hex - Turns a target unit into a harmless critter for 3.5 seconds. Destroys illusions. + 10 Strength + 10 Agility + 35 Intelligence + 150% Mana Regeneration Manacost: 100 Cooldown: 35 |
7. Refresher Orb
Total cost: 5300
Recipe: Obilivion Staff + Preserverance + Recipe
| Active: Reset Cooldowns - Resets the cooldowns of all your items and abilities. + 5 HP Regeneration + 200% Mana Regeneration + 40 Damage + 6 Intelligence Manacost: 375 Cooldown: 160 |
But before you buy this item, check your mana capacity first, if your mana is enough to use 2 times stun, 2 times hex, and 2 times finger, then you can buy this item.
GOOD ALLIES
1. Lina
2. Carries
(Example: Magine, Void, Luna)
Carries should come after you initiate a teamfight, and they should the right click and use all their skills to the enemies.


ANNOYING ENEMIES
1. Cloners
(Example: Phantom Lancer, Naga Siren, Chaos Knight )
You have a single targetted ultimate which is required to know which one is your real target, and cloners can makes you to waste your ultimate if you choose the wrong target. You also have hex that is a single targetted skill. But, you have Earth Spike to know the real self of enemy, by using Earth Spke on Cloner hero with his clones, the hero which have more HP left is the real hero, then you can focus on the real one.


